Hyper-V NAT Static IP
Steps
- Open Powershell with Administrator Privilege
- Enter the following commands
New-VMSwitch -SwitchName "NAT" -SwitchType Internal
# This creates an vSwitch, you can see this using Win+R > enter ncpa.cpl > Enter

Get-NetAdapter
# This lists out all current internet adapter on your PC, find the one you just created
# It should be named like "vEthernet (NAT)", find its "ifIndex" and remember it

New-NetIPAddress -IPAddress 192.168.131.1 -PrefixLength 24 -InterfaceIndex $ifindex
# This is use for gateway creation, the -IPAddress will be your PC IP on this newly created NAT interface
# The -InterfaceIndex should be the number you remember in the previous command.

New-NetNat -Name NAT -InternalIPInterfaceAddressPrefix 192.168.131.0/24
# This command creates NAT network under subnet 192.168.131.0 with subnet mask 255.255.255.0
The IP address in the third and fourth command can be change to anything you like as long as the IP address is in C class(Local IP).
After that, head over to Hyper-V manager, and open up your VM settings.
Click on the network adapter section and change it to theNATswitch you created.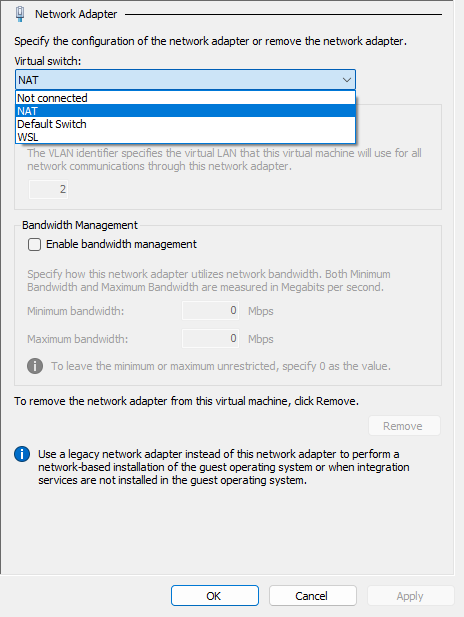
Now connect to your VM, login to root account, and enter
nmtuicommand
Select
Edit a connectionSelect
eth0, press tab once, and then select<Edit...>, then hit Enter
Don't edit profile name and device, use arrow down key to move cursor to IPv4 CONFIGURATION section
Change
<Automantic>to<Manual>Edit Addresses to 192.168.131.2/24
Edit Gateway to 192.168.131.1
DNS servers should be as same as your host system, in this case it's 192.168.1.1 and 168.95.1.1, if you would like more dns server on this vm you can select the
<Add...>under the DNS servers section.Use arrow down to select
<OK>to complete eth0 ip configuration.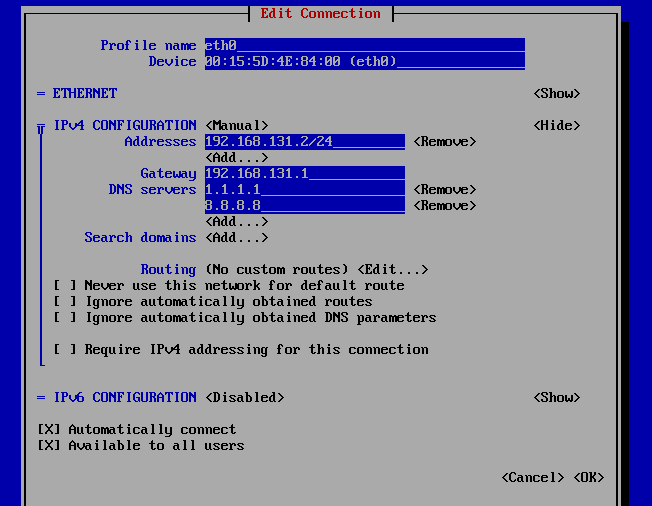
Press Esc to back to previous level, and select
Activate a connectionSelect eth0, deactivate, then activate.
Exit nmtui and try to ping internet, e.g. 1.1.1.1, 8.8.8.8, etc.
If it shows host unreachable, restart VM.
After that, repeat step 15, it should work now, connecting 192.168.56.2 from host system should show the page.
If you wish to expose your VM service to outside network, you'll need following PowerShell command(run as Administrator).
Add-NetNatStaticMapping -NatName "<NAT NAME>" -Protocol TCP -ExternalIPAddress 0.0.0.0/24 -ExternalPort <Port wish to expose> -InternalIPAddress <VM IP> -InternalPort <VM Service Port>